If you follow instructions properly and have the necessary tools to get the job done, then your new LED light bar can be installed with ease. Here are the basic installation steps that you can use along with the directions that were included in the purchase of your light bar.
Page Contents
Verify Before Starting
There are a few simple things you need to be sure about before you commit to installing your light bar. You don’t want to get too far ahead in the process before finding any potential hiccups. Confirm these things:

source:trucktrend.com
Are You Using A Legal Light?
You probably have already checked your state and local regulations when it comes to using auxiliary lights on your vehicle. If not, now is the best time to do it so you don’t have to make adjustments after installation. The biggest light bars might require a cover when not being used to drive off-road.
Are All The Parts There?
If you’ve read up on light bars before your purchase, you probably came across a few reviews that mentioned missing parts in the purchase. Make sure all the pieces the box says are included are really there before you get started.

source:offroadxtreme.com
Do You Have The Basic Tools?
In addition to wrenches, pliers, and a good screwdriver set, you’ll need something to measure with an to mark and drill holes with. You should only use sharp drill bits that are the exact size you need. Dull and wrong size drill bits can be damaging to your vehicle and also cause a lot of frustration. Consider using C-clamps or vise-locks to hold the light bar stead while you’re marking your holes.

source:offroadxtreme.com
Light bar wiring will go well with a good pair of wire cutters, strippers, and crimpers for the connectors. If you use IP-rated or marine grade connectors you won’t need the caulking and tape to seal splices. Wire tires will be beneficial when routing wiring inside the cab and under the hood.
Does The Light Bar Work?
As soon as you open the box, connect your light bar to a direct power source. It can be your battery or another DC voltage source, but whatever you choose as a power supply, make sure it has the right voltage output according to the light bar’s specs. Also, make sure it can provide the maximum current your light bar needs. AC current is a horrible choice because it will cause damage.

source:trucktrend.com
To test, connect your red wire from the light bar to the positive side of the power supply or battery and the black wire to the negative side. If you do not see the light working you will need to remedy this before you move on with the installation. Hopefully, you’ve purchased one of the quality light bars and this will not be an issue. Be careful not to look directly into the LEDs because the high-intensity light can be damaging to your eyes.
Installing LED Light Bar Mounts
Mounting brackets will differ depending on the manufacturer or size of your LED light bar. The smaller light bars which are about 4 to 12 inches could have one or more threaded studs on the bottom. The longer light bars will usually have studs on all the ends which would fit into right-angle brackets that are screwed or bolted to the chassis or vehicle body.

source:trucktrend.com
Some bars come with channel mounts which give a little flexibility when placing the mounting brackets in position while sliding into the housing channel. If you have a roll bar or lumber rack, clamps and specialized bar mounts could be the easiest way to attach your LED light bar. You should purchase a small amount of liquid thread locker to prevent nuts and mounting bolts from loosening over time due to vibration.
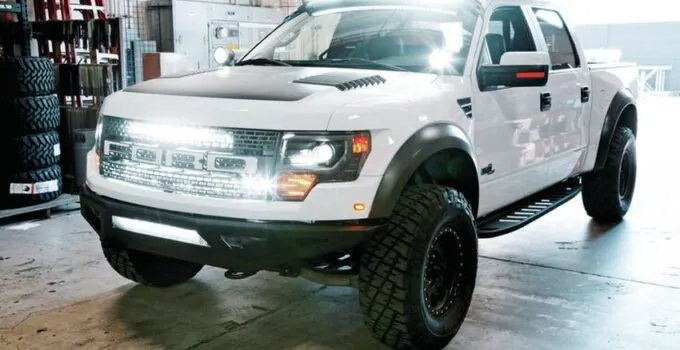
Mounting On A Stud
Smaller light bars are commonly mounted in the grill of the vehicle or beneath the bumper for fog lamps. If you only have a stud to use, you might want to fabricate a bracket to make a solid mount. Don’t bother attaching the stud to plastic no matter how solid it feels. Over time the vibration will just crack the plastic surrounding the hole.

source:trucktrend.com
End Brackets
To get your end brackets properly aligned attach them to the end studs of the housing and get help from one or a couple of people to place the light bar in its final place. Use your free hands to make the exact marks through the holes in the bracket bases so you know where to drill. Engage in careful drilling by uses a few drill bit sizes to add up to your final hole. Start off with about a 3/32 inch and then go larger with bit midway the size of your first bit and last bit. Then the final hole you drill should match the exact size you need for the mounting bolts.
Channel Brackets
Channel brackets need to be placed no more than one-quarter of the light bar length from either housing end. If the mounting surface has reinforced areas, aim to place the brackets on those to reduce vibration and boost stability.

source:trucktrend.com
LED Lights Mounting Bars
Mounting clamps are a good way to mount your lights if you have a roll bar. This works best for smaller lights, but the clamps allow you to aim in three dimensions. If you don’t have a roll bar, you can purchase an aftermarket light mounting bar kit. For more visit maddigi.com.
Original Equipment Brackets
Original equipment brackets are often made by aftermarket suppliers and LED light bar manufacturers to place on specific vehicles. These brackets will use the existing chassis holes and body of your car and truck. Make sure the rear of the light bar gets good ventilation and is not installed near a heat source. LEDs need to stay cool to maintain proper functionality and durability. Not many people are familiar with which manufacturers are the best in the business, and therefore, you can check this bestazy comparison for the best-LED light bars.

source:trucktrend.com
Installing LED Light Bar Wiring
Consult lightbarreport.com for an extensive guide on LED wiring. For now, the basic steps you need to be ready for are:
- Disconnect the negative battery terminal first
- Automotive GPT wire is easy to find and acceptable, but GTX and TLX wire grades are better
- Pick a wire gauge that matches or surpasses your maximum current need for your light bar
- Fuse power wires to anticipated current, not the wire size
- Use an automotive switch relay if your light bar is drawing 10A or more
- Use a cab switch rated for 10amps regardless if you have a relay or not
- Visit a local marine shop to purchase waterproof wiring connectors
- Stay away from unnecessary splices, but easily remove them with a snap-in connector at the light bar

source:trucktrend.com
Time To Get Started
Take your time and plan out how you will complete this installation. Don’t rush anything and just tackle each step in its specific order. Continue to think ahead and prepare for what needs to be done so you don’t get overwhelmed. If the project proves to be too much or if you start having doubts, reach out to an expert for help or advice. Once your installation is fully completed, you are ready to let your light shine!


