When companies or people need a lot of plastic parts, one of the things people opt for is injection molding. Though it is a relatively simple and straightforward process, there is a wide range of actions that revolve around creating the finished products. Most of the plastic items around you are, in fact, manufactured by these casting machines.
If you are interested in learning more about the overall injection casting process, this article might help you. The text below is going to feature a guide that will take you through the six steps in the process. However, before we take a look at that, let’s first take a closer look at the machines used for manufacturing a large number of items:
Page Contents
Injection Molding Machines: Explained
source:rjcmold.com
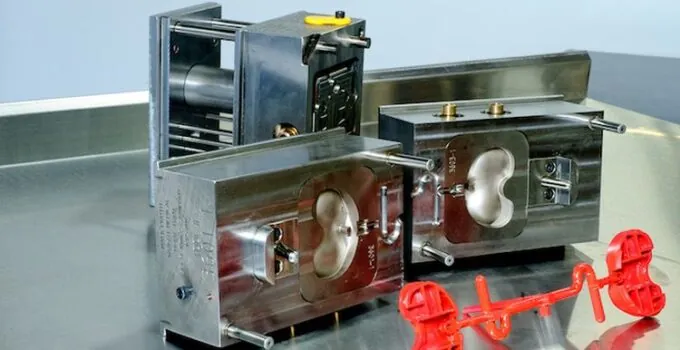
A molding/casting machine, or as it is also referred to as an injection press is made from two principal parts. The unit that injects the material and the unit that clamps it while inside. The casts can be connected to the devices either horizontally or vertically, but, this will mostly depend on the type or size needed.
You can also choose whether you’ll utilize hot or cold runner systems that will carry the material from the container to the casts. Once again, this will entirely depend on what you are producing. There is a wide range of molding machines, and they are all categorized by the system they utilize. Some of the most popular options include electric, hydraulic, and mechanical devices.
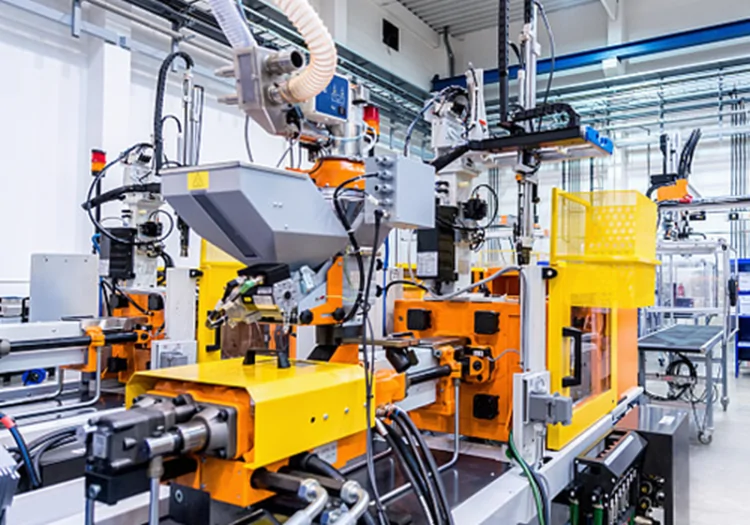
The Casting Process: A Simple Guide

source:plasticstoday.com
Step 01: Designing The Product
Designing the item is the most crucial action, especially since it can reduce the chances of expensive mistakes from occurring during the later manufacturing stages. There is a wide range of goals when designing a product, and some of the things that you’ll need to focus on include the aesthetics, assembly, functionality, as well as whether or not it can actually be made.
According to Gembah, most commonly, designers choose to use CAD for their prototype design and proficiency in using these programs is crucial, especially since it allows people to create accurate items and iterations. If you are looking for some prototype manufacturing companies, check out Moldall to see which ones you can opt for.
If you want to avoid mistakes and faulty products, one of the things that you can do, that will surely allow you to avoid any mistakes is to implement uniform wall thickness where possible, as well as to gradually make a transition from one thickness level to another. Of course, you can always choose to hire a professional designing team that will help you with your prototype.
Step 02: Designing The Cast

source:plasticstoday.com
Your next move is to design the cast for the manufacturing process. Usually, these molds are made from specific metal types such as:
– Durable Steel – which is also a costly option to utilize for a cast. However, the will last you several years. This is why this option is good if you need to produce hundreds, if not thousands of items.
– Steel That Was Pre-Hardened – which will not last for as long as the previous materials, but, it is a good option if you are looking for an alternative to hardened steel.
– Aluminum – is usually utilized for single cavities when you need to create and test a small number of items. Once you test and approve the parts, then you can produce a tool that features multiple cavities. Yes, you can use it for mass-production, but it is most commonly used for smaller production orders.
Just like the previous point, designing the mold can also prevent faults and mistakes in the overall process. This can means that you can avoid designing the wrong draft, as well as avoid placing the sized gated improperly. Gates allow the material to go inside the cast, and if not designed well, it can cause scarring and other aesthetic problems.
Step 03: The Process Begins With Closing The Mold And Injecting The Material

source:plasticstoday.com
The first action in the manufacturing process is closing the mold and injecting the material you have chosen for your items. This means that you’ll need to press a button for closing the mold, as well as one that will inject the heated plastic in it. As the material enters the case, the remaining air will be pushed through a vent.
Step 04: Cooling Down

source:plasticstoday.com
Once the entire cast is filled, the material is then allowed to cool down. The time it will need for cooling will depend on the material you used, as well as the thickness you chose for the part. Every single case is created with an internal system for either cooling or heating. Most of them allow water to cycle through the case, which means that it will maintain a temperature that is constant.
Step 05: Ejection And Testing

source:plasticstoday.com
The ejection part is relatively simple since the cast will open and an ejector tool will remove the items from inside. The item falls and is caught by a container located underneath it. Once the parts are out of the device, you should then test and examine whether or not they are functioning well. This will ensure that you do not send parts that are flawed or completely unusable.
Step 06: Packaging

source:plasticstoday.com
Some machines might have runners that can be reused for other things, which is something that can lower the expenses you can. The reusable parts that you have left will be weighed, counted, processed, and packaged in order for them to go through the assembly and/or packaging process. Of course, not all molds will have plastic runners or waste since the system might have maintained continuous heat.
Last, but equally important is the packaging. Depending on the items you produced, ensure that it is protected and secured. This will help you avoid any defects or damages to the items during the transportation, hence, you might want to ensure that it is properly packed.
Conclusion
Although it looks like a difficult process, injection molding is relatively easy, especially when you consider that it is mostly automated. So, now that you know how you can get the parts that you need, you should not lose any more time. Instead, start searching for a company that will turn your prototype into a real thing!


